
Sunday, June 29, 2014
Curios Show Opens July 3
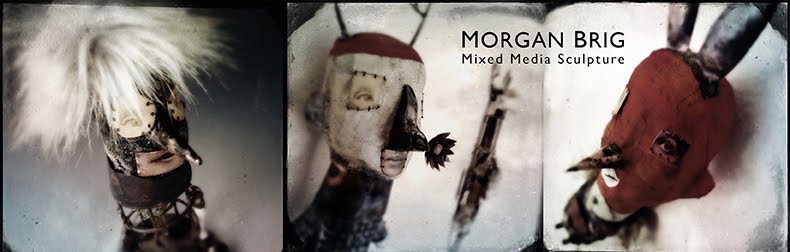
I'm very excited to have my "Curios" Show done and delivered to the Patricia Rovzar Gallery! For a preview of the artwork, please click on the photo link below. The show opens July, 3rd, 6-8pm. Patricia Rovzar Gallery, 1225 Second Avenue, Seattle, WA. Hope to see you there!
Sunday, June 1, 2014
Black Clay
A couple of months ago I experimented with black high fire clay. It has some mineral in it that apparently is quite toxic (magnesium?) so one has to use plastic gloves when molding it. For me, and I suspect most artists, that is a bit frustrating because the gloves don't fit so well and so all that sensitivity to creating expression in the clay face is minimized. I swore that I'd forget about using black clay again.
I created one head and then used a white underglaze on it which I then partially sponged off. Much of the underglaze burned off, but not all and it ended up having a stone-like patina to it. I love it! Ha! Back to using black clay - gloves and all.

This piece hangs from an upper metal grid that attaches perpendicular to the wall.


I created one head and then used a white underglaze on it which I then partially sponged off. Much of the underglaze burned off, but not all and it ended up having a stone-like patina to it. I love it! Ha! Back to using black clay - gloves and all.
This piece hangs from an upper metal grid that attaches perpendicular to the wall.
It has a title that keeps bumping around in my head for years now: "Some Say It Is Already Written, We Must Only Remember ". That idea that we choose our parents and talents before we are born, but then forget everything as we come into the world. (Sigh. What's up with that?) So as young adults and/or grown adults the puzzle is to remember. On the figure is etched "parte incognita" - meaning there are still parts unknown.
I like the hanging method. It feels quite different for me. A bit jewelry-like.
Monday, May 26, 2014
Two Copper Boats
I finished and photographed a couple more boats. "Curios" I showed in process several weeks ago and "Industrious" with all of it's red towers (still the favorite color!) I finished just this last week.


 |
| Curios Copper, enamel, brass, mixed media 9x20x5" |
 |
| "Industrious" Copper, enamel, nickel, mixed media 11x22x4" |
Friday, May 23, 2014
Conquering Carpal Tunnel for Artists
In 2005 I got carpal tunnel so bad, I couldn't hold a pencil without a ton of pain. So I did some research and found a book on Amazon that helped me to recover fully.

I highly recommend this book by Sharon J. Butler. She explains all the how and why behind repetitive strain injuries and then goes on to show you how your can heal yourself through simple stretching exercises. I know it's hard to believe that simple stretches can make the difference, but for me it's the difference between being a practicing artist daily or just observing other artists from the sidelines. Depending on one's level of pain she takes you through different stretches, and as you progress into less pain, there are new stretches. All with very simple diagrams to show you how.
I take about 4-5 minutes each day after I quit my metalsmithing and do a few of her stretches and the carpal tunnel has not come back. Pretty amazing no? I hope you'll check it out if you're arms, wrists, hands (back, neck, shoulders, chest) are hurting.
Sunday, May 18, 2014
Ceramic and Metal Figure
Several weeks ago I finished a figure that not only has a ceramic head, but also a ceramic torso (a first for me). I like the puzzle of figuring out how it all goes together. This one is strung together through the outer ceramic neck on the head that has two holes in it. The copper rod that goes through the outer neck also goes through holes in the inner neck which is attached to the torso (they line up), which is then brazed to a copper neck band. Then I brazed copper wire to the neck band and threaded it through the holes in the ceramic torso "shoulders" and attached copper arms to the wire.
To reinforce holding the head to the torso there is also a threaded rod that goes from the top of the head down through the torso and a metal napkin ring to the crotch. Hex nuts go on both ends.
This piece is about the feeling I get sometimes that there is a whole lot of mystery/knowledge just below the conscious surface of things. Something I'd love to get my hands on but seems just out of reach - hence the title "The Mystery Just Beneath the Surface".

 |
| Ceramic, copper, etched brass, nickel. 22x6x3" Wall mounted |
To reinforce holding the head to the torso there is also a threaded rod that goes from the top of the head down through the torso and a metal napkin ring to the crotch. Hex nuts go on both ends.
This piece is about the feeling I get sometimes that there is a whole lot of mystery/knowledge just below the conscious surface of things. Something I'd love to get my hands on but seems just out of reach - hence the title "The Mystery Just Beneath the Surface".
Sunday, May 11, 2014
Copper Boat "Curios"
I'm currently working on another boat out of fabricated copper. I've recently been doing the hulls in a much heavier weight copper sheet, up to 32 oz. I love the heavy sturdiness it gives the hull. I'm still using lighter weights for the cabins that go on the decks (24-20 oz).
This one is called "Curios".

Curios will have riverboat-style wheels along the side and then one caster wheel in front tucked under the bow. There will be a wheel cover over the side wheels with one of the following graphics on it - I'm still deciding on the color.


Knowing me, it will probably be the more muted yellow version since I've already put so much red on the boat. I'm thinking a little bit of decal on the cabin too, but we'll see. I'm looking forward to playing around with this part.
This one is called "Curios".
 |
| Unfinished "Curios" awaiting specimens to be hung from the metal grid on the deck. |
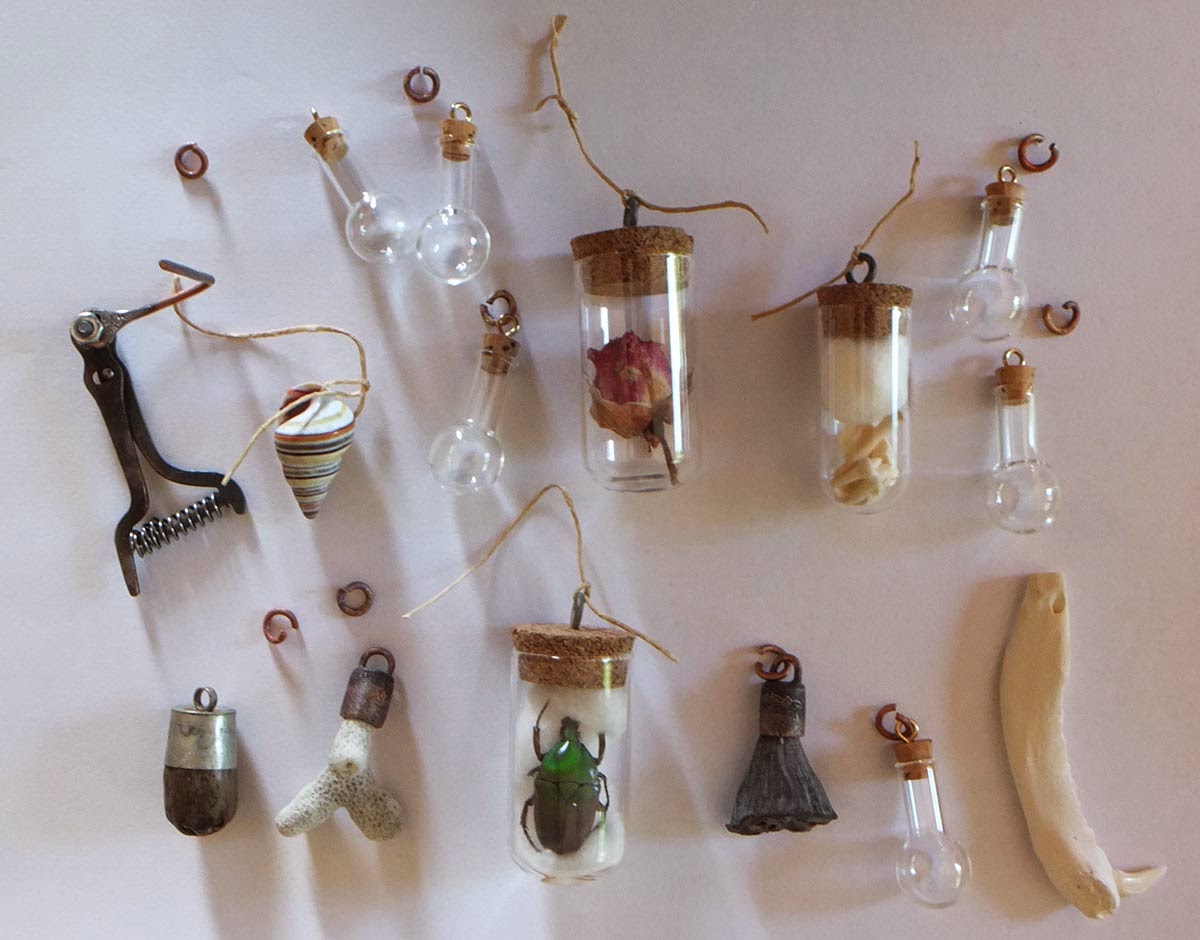
I had so much fun with the hanging "specimens" in small glass vials on my last boat (Galapagos), that I wanted to explore different shaped hanging objects on another boat. She'll have some of the objects below hanging off the back metal grid. I'm still trying to decide what goes into the little glass vials.
Knowing me, it will probably be the more muted yellow version since I've already put so much red on the boat. I'm thinking a little bit of decal on the cabin too, but we'll see. I'm looking forward to playing around with this part.
Sunday, May 4, 2014
Somedays She Is Nuclear
I'm not feeling particularly nuclear at this moment.
Yet there are days, now and again, when I work in my studio and the help that I asked for the night before from the Universe is unquestionably there in the room. Isn't it lovely when that happens? For me it is when the strangest concepts enter into my mind, certainly not mine, yet they make total sense and they have a certain grace. Such concepts energize me like crazy, even as I don't quite know how to proceed. That feeling of knowing I'm going to dive into all that uncertainty is delicious. And I also know that there's really no other place I'd rather be.
Yet there are days, now and again, when I work in my studio and the help that I asked for the night before from the Universe is unquestionably there in the room. Isn't it lovely when that happens? For me it is when the strangest concepts enter into my mind, certainly not mine, yet they make total sense and they have a certain grace. Such concepts energize me like crazy, even as I don't quite know how to proceed. That feeling of knowing I'm going to dive into all that uncertainty is delicious. And I also know that there's really no other place I'd rather be.
| "Somedays She Is Nuclear" Copper, ceramic, enamel, mixed media. 33x20x6" |
| Detail |
Friday, May 2, 2014
Double Decker Riverboat
Another riverboat with a second layer of cabin space. Using blues in the palette on a boat is new for me. I guess as long as I get my favorite red enamel in there somewhere I'll like it.
 |
| "Bellissimo" Fabricated copper, torch-fired enamel, mixed media. 11x17x5" |
Sunday, April 27, 2014
The Ship Galapagos
 |
| "Galapagos" Copper, enamel, brass, glass, mixed media 14x23x6" |
Yesterday I finished a ship that I've been working on for several weeks. It is the most ark-like boat that I've made to date. I wanted it to represent the journey of my life so far. Along the way there have been memories and experiences that I have kept close to me, and they are represented by the bottled "specimens" lined up on the top deck. There are talismans too, etched in brass attached to the deck just below the glass vials. In my mind they protect and also bring good spirits. I've always loved the idea from generations past, that words / letters / symbols placed 'just so' within a circle can have such powers.
 |
| Glass vials with talismans below |
 |
| Red seed "bumpers" |

The big wheel cover is a photo I took of some local chamomile weeds, along with a tiny starfish and, of course, tiny vertical stacks of the planetary signs (for my hope that there will be guidance in the days ahead of my journey).
Thursday, April 24, 2014
Inspirational Glass Etching
Several weeks ago while cruising around Pinterest, I happened upon the work of glass artist Andy Paiko. Wow! Nice work. Mostly I love his imagery and the layout of those images that he has etched into his glass vessels. Cycles of the moon, planet symbols, and line-work images of insects and animals, to name a few.
 But I am also inspired by the juxtaposition of the clear glass to the bone, coral, etc that he puts inside the vessels. It seems scientific, mysterious and precious all at the same time. Perhaps a message about our evolution?
More of Andy's beautiful work can be found at his website.


More of Andy's beautiful work can be found at his website.
Saturday, March 29, 2014


Sunday, March 23, 2014
Finishing the Copper Riverboat
I finished up the copper and enameled riverboat "Queen Bee" this last week. I took some pictures along the way to help show the process.
 I completed assembling my large and small cabins and now want to attach them to the deck of my hull. I figure out where I want the cabins to be and then braze 1/4" pipe segments to the hull and cut holes in the tops of the cabins where these pipe segments will come through.

 Then I braze the pipe segments to the top decks of the cabins. This holds the cabins to the deck.
 In the case of 2 cabins stacked, like above, I braze it on the lower cabin first and then put the top cabin on top and braze it in place.


Next I'll either hide the brazed ends sticking out of the cabin tops with a chimney, or use the end to support a flag pole. In the picture above you can see where the process of brazing the chimney onto the front small cabin left a black carbon mark. I remove that by placing the entire boat into a solution of Etchall, which not only removes the carbon but also takes the high gloss of the enamel down to a matte surface. One more thing before that final Etchall bath, I attached the copper wire railings to the deck.
To give the back caster wheel a place to attach, I brazed a bit larger copper pipe in place under the deck. This is one of those instances where I get out the two part epoxy and put a fair amount into the pipe and then slide the caster wheel rod into place and hold it until the 5 minute epoxy sets up. Next I added some striping to the small cabins by adhering decals to them.
Finally, a finished riverboat!
Sunday, March 16, 2014
Copper & Enamel Riverboat
Last week I started playing around with making boats again. I think I have a love of boats that is here to stay. Yet each time I revisit my ship making, I always like to experiment with new proportions just to keep things interesting. This time around I found some images of old tin toy riverboats that called out to me. Then began the process of figuring out how I might assemble such a structure. Here in shorthand is my thinking.

First the hull structure (the long narrow piece) and the top deck. I like to use a card stock for figuring out the pattern because it can be taped together with scotch tape first to see how it works out.

The challenge with that long hull piece was making the curve just right for the stern and then torch-firing it. A pretty awkward piece to handle. Then I brazed it to the deck. Wheels are attached with a threaded rod through holes drilled in the hull.

Next were the wheel covers (the half circle with brazed sides). The graphics on the wheel covers are created in Photoshop and then output onto an inkjet decal paper. Tiny screws attach the wheel covers to the hull.

The white enameled top cabin came next. I cut all those windows out with a jeweler's saw (lord!). The cabin isn't attached yet, nor are any of the chimneys. I need to create 2 more smaller cabins. I just have paper place holders in for them in this picture, but the pieces for them are laying on the desk.

First the hull structure (the long narrow piece) and the top deck. I like to use a card stock for figuring out the pattern because it can be taped together with scotch tape first to see how it works out.
The challenge with that long hull piece was making the curve just right for the stern and then torch-firing it. A pretty awkward piece to handle. Then I brazed it to the deck. Wheels are attached with a threaded rod through holes drilled in the hull.
Next were the wheel covers (the half circle with brazed sides). The graphics on the wheel covers are created in Photoshop and then output onto an inkjet decal paper. Tiny screws attach the wheel covers to the hull.
The white enameled top cabin came next. I cut all those windows out with a jeweler's saw (lord!). The cabin isn't attached yet, nor are any of the chimneys. I need to create 2 more smaller cabins. I just have paper place holders in for them in this picture, but the pieces for them are laying on the desk.
The brass caster wheel will be used in the stern underneath. I have a support in there now just as a stand in. I'm thinking the caster connection will get hidden under the small back cabin I have yet to make.
More to come...
Sunday, February 23, 2014
Ceramic Heads
I spent four days this week creating heads for future pieces in low fire white clay. Making heads for me is always a big challenge. What expression will they have? How big? Because the clay still feels so new to me and I seem to get fearful that nothing will come out right (I do find this part of myself annoying), I tend to just Dive In. I don't have any idea what I'm after except creating a face that I am curious about and feel a kinship with emotionally.


I also try not to get too attached to any one just yet, as they could still blow up in the kiln or the glazing will turn them into something (someone) I don't want to work with. Crazy, I know.
So as I get these off to be bisque fired I wish them all the best of luck! Come back in one piece everyone!
Sunday, February 16, 2014
Photographing Artwork
First off, let me just say that I am not a photographer. I have come to the place of photographing my own work out of frustration that those photographers that I have used and loved in the past have all retired! Well, that's not all of it. Actually, there is the cost issue and the immediacy issue too (as in having to have a photo of a piece right now). Also, I do think with digital cameras these days and Photoshop, it's easier than it used to be to shoot one's own work.
So I thought I would show my very humble method and set up.

I also bought a digital camera last year that I love. A Fuji X10. I got it on Ebay used and it's worked great! My lighting system is daylight and only daylight as you can see from the studio photo above. I have a white translucent window shade (Ikea) that I pull down and a tripod. In the case of some of my wall hung pieces, like this one, I hang it off of two wires mounted to the ceiling. Then, if needed because the piece doesn't hang perfectly, I attach a string to the base of the art and pull it forward until it looks the way I want and attach the string to a weight on the floor to hold it.
Overcast days work best for lighting. Easy to find that here in the Pacific Northwest.
I shoot the photos in RAW format using the 'Automatic' camera setting and bring it into Photoshop CS6 on my iMac OSX. My shots done like this are almost always pretty awful looking when I first bring them into the computer. An example of awful below:
 |
| YUCK! |
See, very blown out. But after I open it in Camera RAW on the computer, I start adjusting. First I adjust Exposure, then Contrast, then Saturation, then Vibrance, and then Clarity. I have to say that the magic adjustments for me are typically Exposure and Clarity. They save my behind.
 |
| "This Light of Mine" Copper, ceramic, enamel, brass, mixed media. 30x21x3" |
Then I save the RAW image as a tiff and open it again in Photoshop to crop as needed, also erase my hanging wires and pull-string using the clone tool. Then I consider it done!
I'm still wanting to buy a softbox for a light on a tripod and play with that, but haven't quite gotten there yet. Perhaps this year. It would also be nice to control my lighting on those little copper letters just a bit more too. So the journey is definitely ongoing...
Subscribe to:
Posts (Atom)